In this tutorial, we will continue where we left off in the "Basic Log" tutorial and add a third log to the project, this time a well log.
To continue, start BorinGS by double clicking (or single clicking, depending on your operating system settings) on the BorinGS icon. If the software has been registered, the main entry screen will be displayed. When starting the trial version, a "nag screen" must be dismissed first.
Open the previously saved file by clicking "File-Open" from the menu, or clicking the "Open" button on the toolbar. Navigate to the data file (we called it "tutorial.bgs") and click "Open."
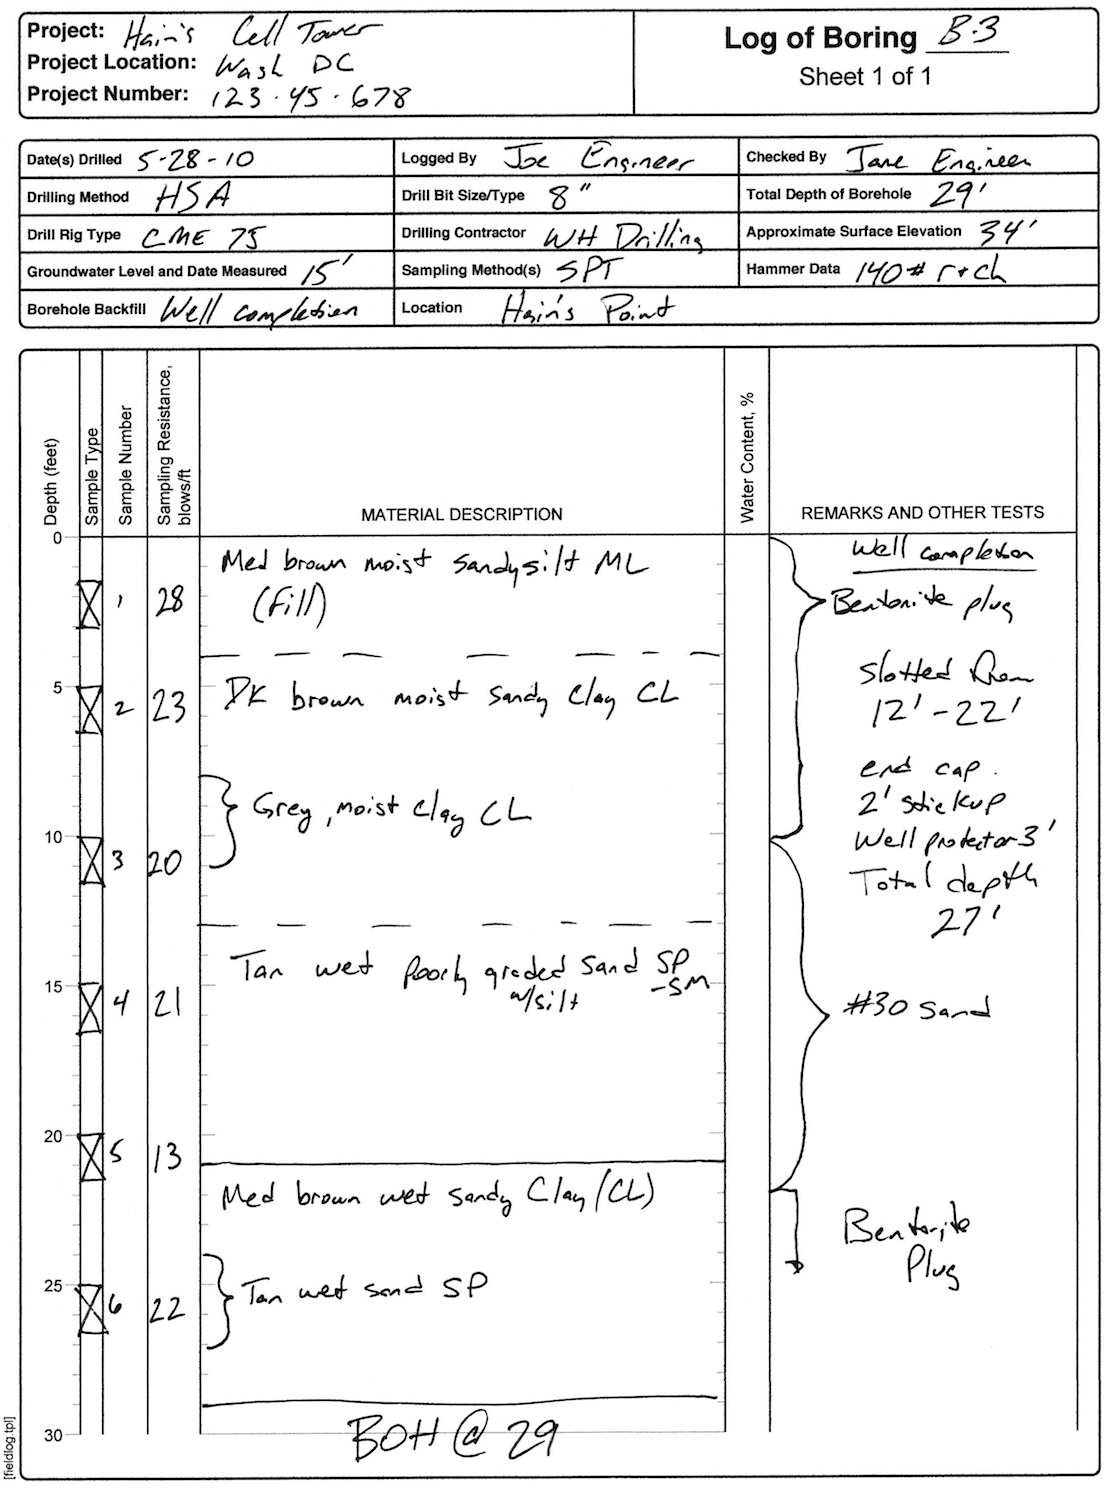
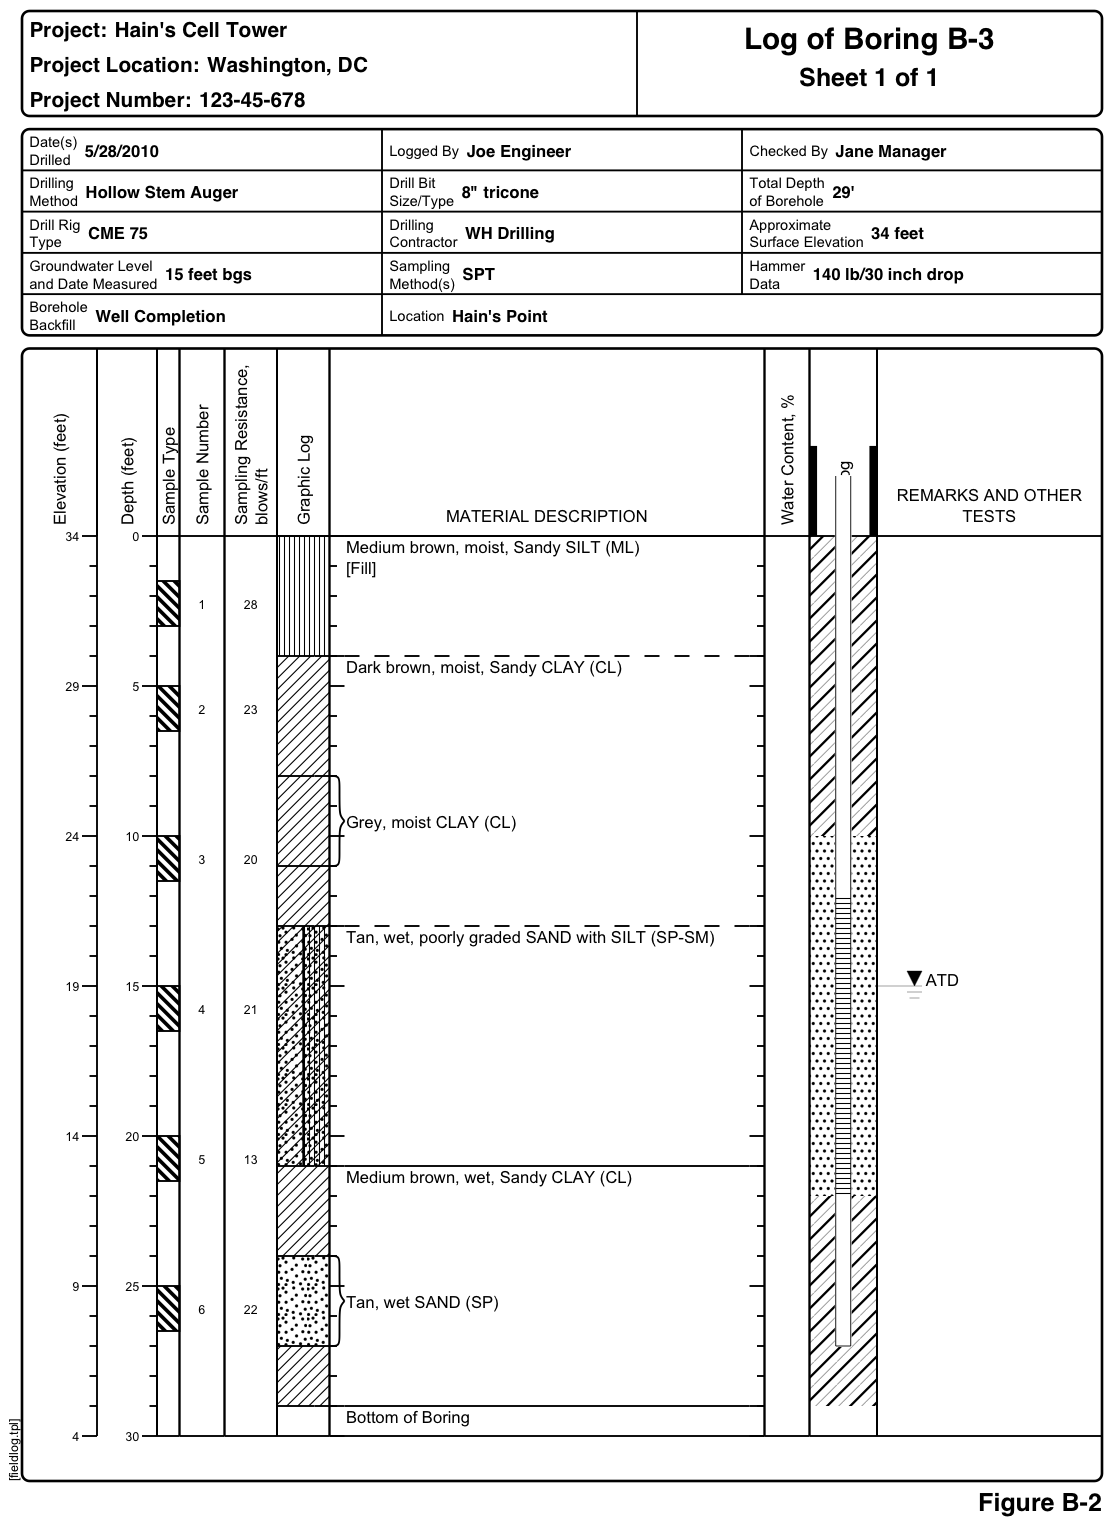
We will be adding data from the field log shown below.
Begin by adding a log to the project. Right click your log in the log list and select "New Log Below" to create a new log below B-1. Once the new log is created, click the "New Log" text to select it, and the new log will be displayed.
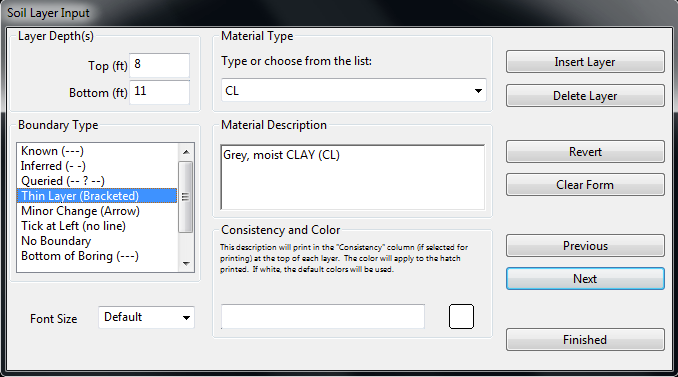
We will enter the headers, layers, and sample information as we did in the first two tutorials. Note that during layer entry, we have to add a bracketed layer from 8 to 11 feet. To do this, select the "Thin Layer (bracketed)" layer type to activate the "Bottom" text field. Enter "8" for the top, and "11" for the bottom, and fill in the soil type (CL) and description ("Grey, moist CLAY (CL)") as shown below.
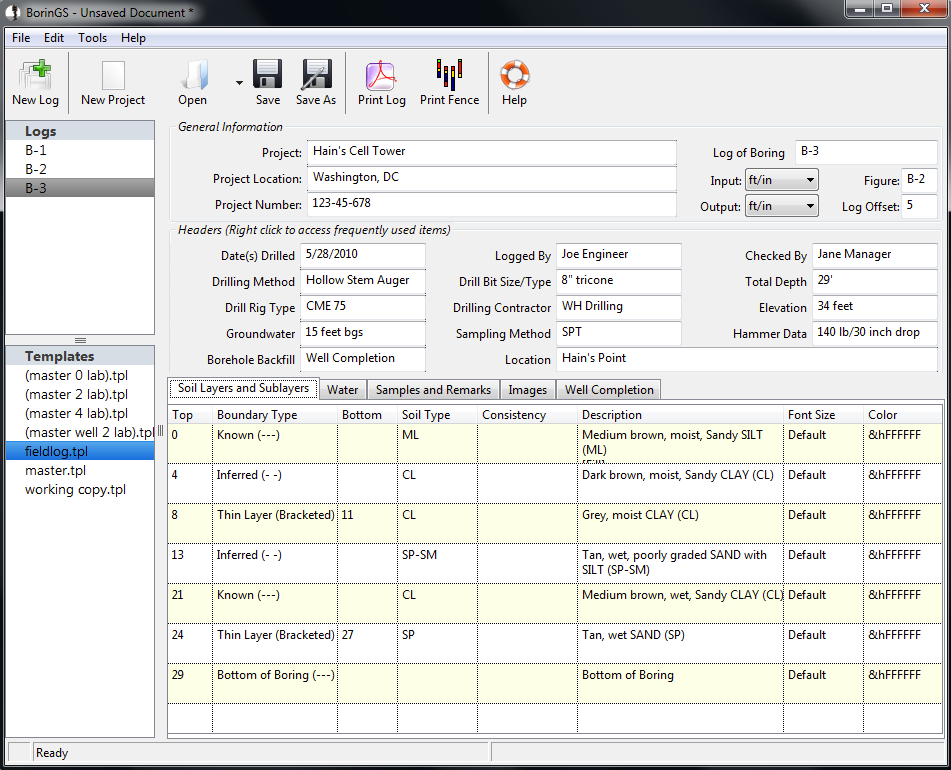
Continue entering the layers and sample information. At the end of entering the data, the screen should look as below.
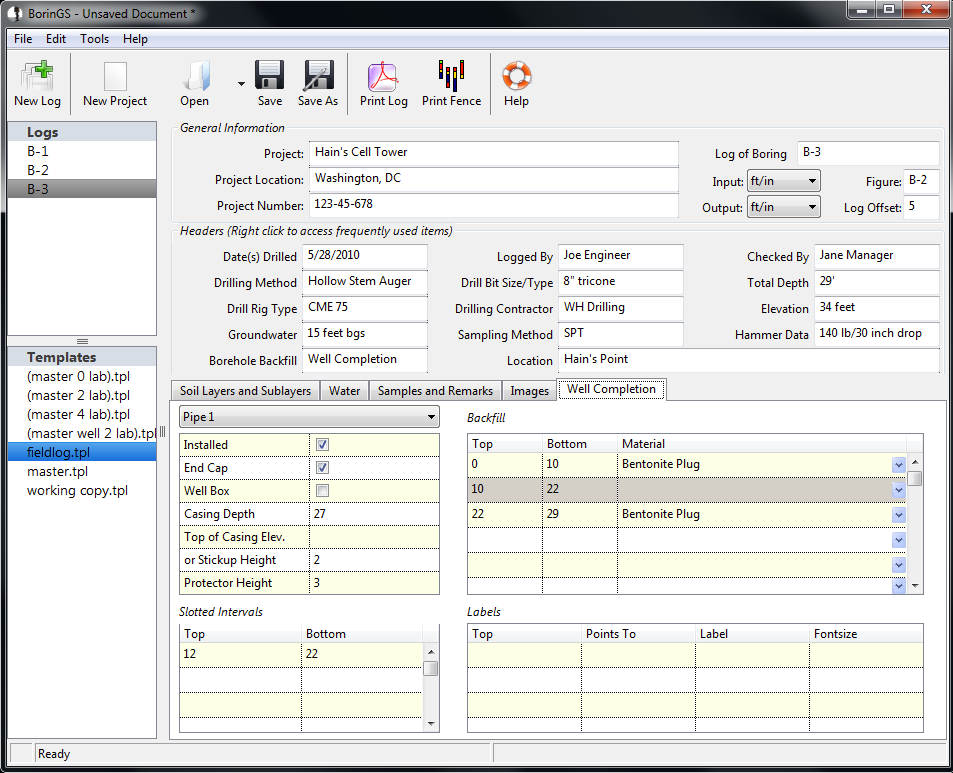
The well completion data we will be entering was written in the "Remarks" column of the field log.
Begin by clicking the "Well Completion" tab on the main
screen.
We will begin by entering data below the "Pipe 1" pulldown box (this
allows for multiple wells in a single boring, however we will only be
entering data for Pipe 1). Make sure that the "Installed" box is
checked.
From the field log, we know that there is an end cap, the
total depth of the casing is 27 feet, the stickup height of the pipe is
2 feet, and that there is a 3 foot high well protector installed around
the pipe.
In addition, we know that the slotted interval is from 12 to 22 feet, so enter that in the "Slotted Sections" grid.
There are three backfill layers - a layer of "Bentonite Plug" from 0 to 10 feet, #30 Sand from 10-22 feet, and Bentonite Plug from 22 feet to the bottom of the hole at 29 feet. Enter the first layer by typing "0" in the "Top", "10" in the "Bottom," and selecting "Bentonite Plug" from the popup menu.
Enter the second layer by typing "10" in the Top, "22" in the Bottom, and then note that there is no "#30 Sand" in the material list. We could choose to use a different material type (the name will not be displayed on the log, so you may wish to use a basic SP pattern), but we will define our own "#30 Sand" material type later. For now, leave the material type blank.
Finish entering the third soil layer. When you are finished, the well log section should look like this (notice the blank Material in the Backfill section).
To add the #30 Sand material type, click Tools-Edit Materials on the main toolbar to display the Material Manager.
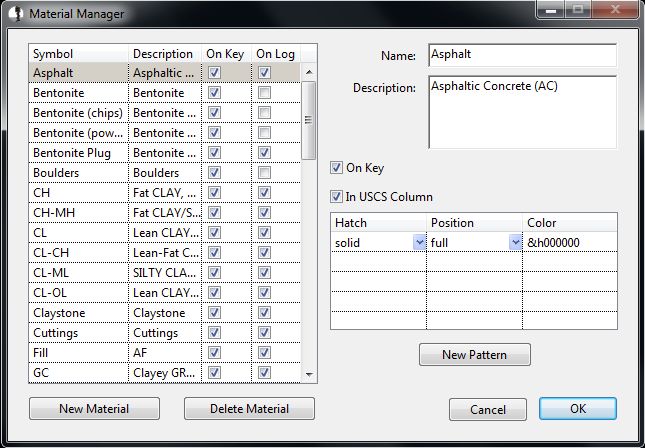
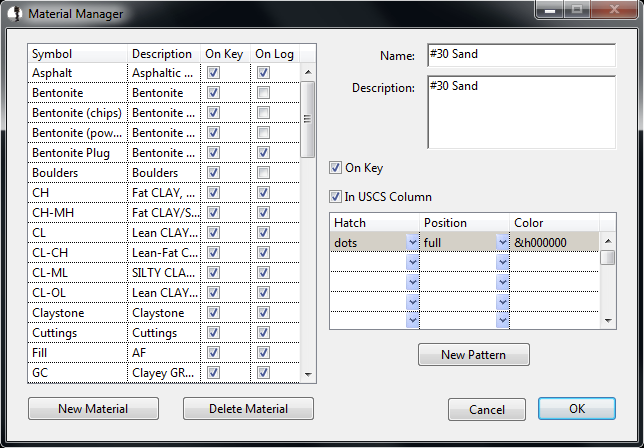
Click "New Material" to begin entering a new material type. Under both "Name" and "Description," type "#30 Sand." If you want the material to be displayed on the key, check the "On Key" box (we will leave this unchecked). Leave the "In USCS Column" unchecked.
Click the first "Hatch" row and select
"dots", set the "Position" to full, and click in the Color column to
display the color picker. Choose black and click OK to
close. When you are finished, the new material should look like
below. Click OK to save the material and close the manager.
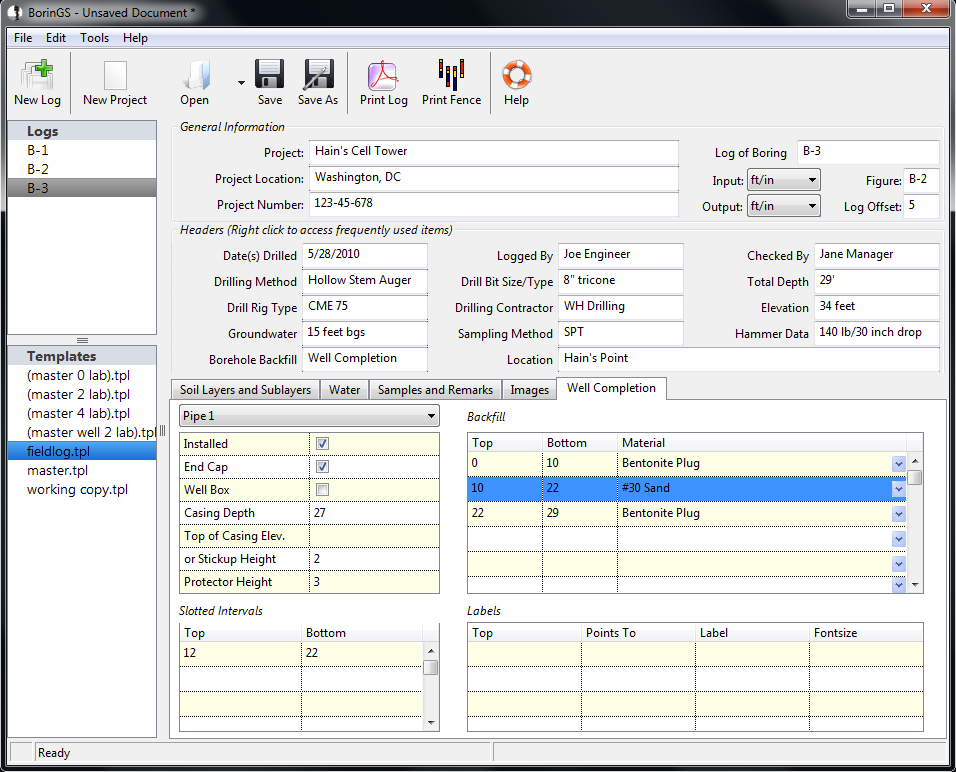
Now that the #30 Sand is defined, we can finish entering the well completion backfill data. Click the blank field and select #30 Sand at the top. The well data should now look like:
Our field log template does not have a well log column, so to print the well log data we will need to add one. We will copy the fieldlog2.tpl template to a new fieldlog_well.tpl template and then customize it.
In the "Available Columns" list, select the Well Log column and either double click it, or click the "-->" button to add it to the "Displayed Columns" list. Select it in the Displayed Columns and click "Move Up" until it is displayed just above the Remarks column.
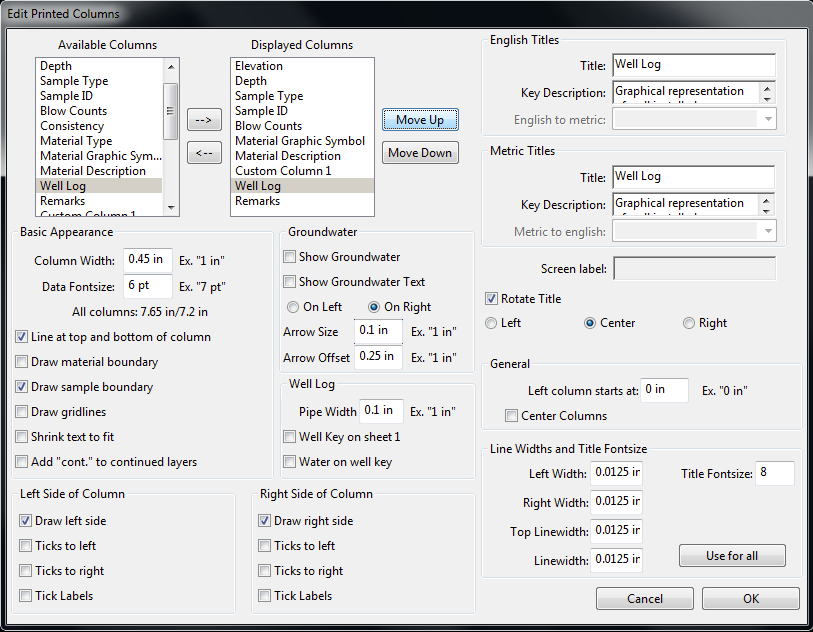
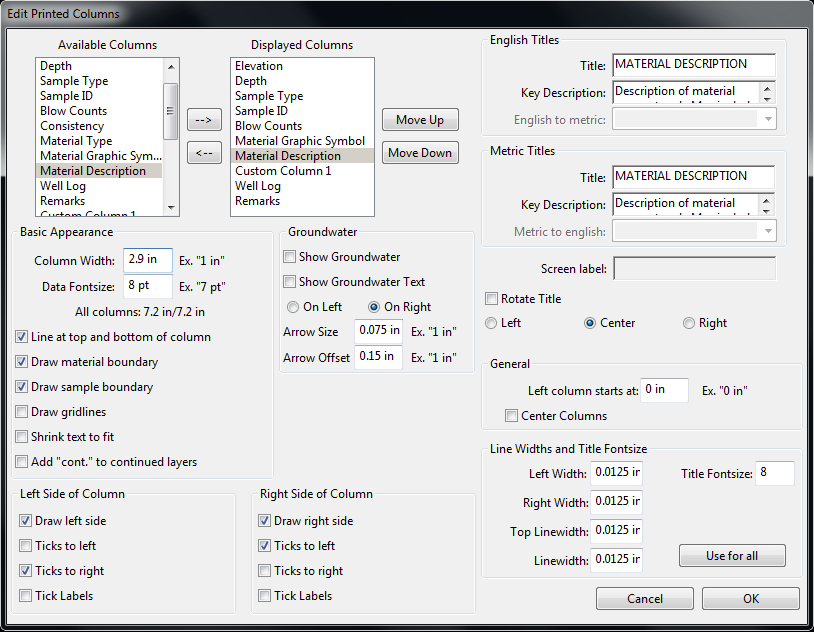
Note that the total column width is now too wide for the page (7.65
inches vs. 7.2 inches). We need to remove 0.45 inches, so we will
remove 0.2 inches from the Remarks column (making it 1.5 inches) and
0.25 inches from the Material Description column (making it 2.9
inches).
When you are finished, click "OK" to save the template.
Click on the "Print Log" icon on the toolbar to view the output, as shown below.
At first glance it appears okay, however
the well (and protector) is sticking up into the "Well Log" column
title. The log would look much better if it were shifted down.
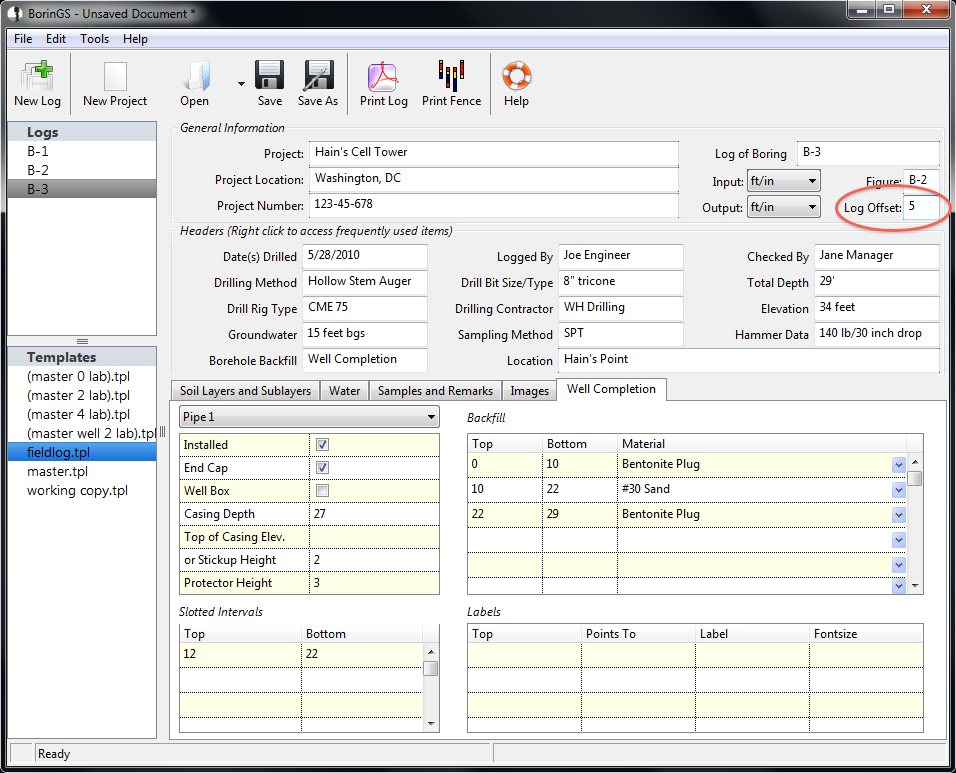
However, if we shift it down enough, the bottom will be pushed onto a second page, and we want to print this on a single page. So we will need to change the following:
To shift the log down 5 feet (leaving room at the top of the well column), enter "5" in the Log Offset entry field near the upper right corner of the screen, as shown below.
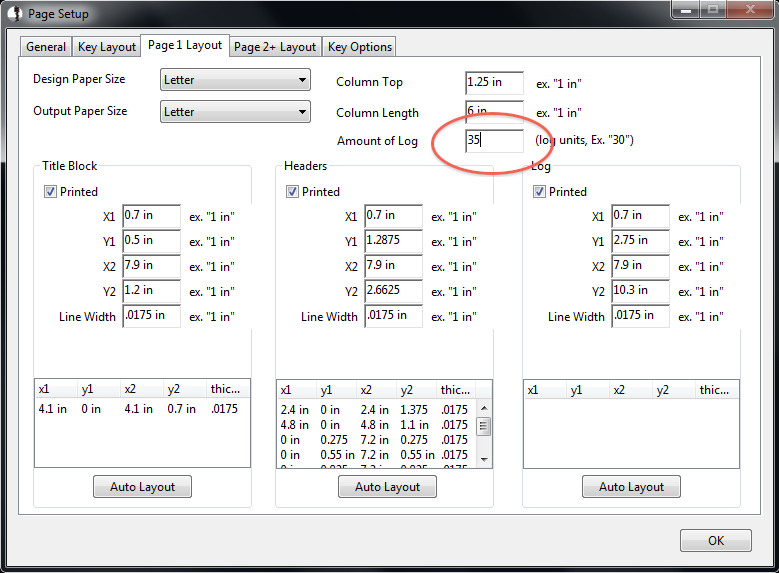
Right click the "fieldlog_well.tpl" template and select "Edit Page
Settings." Under the "Page 1 Layout" tab, change the Amount of Log
value to 35 as shown below. Click OK to save the template.
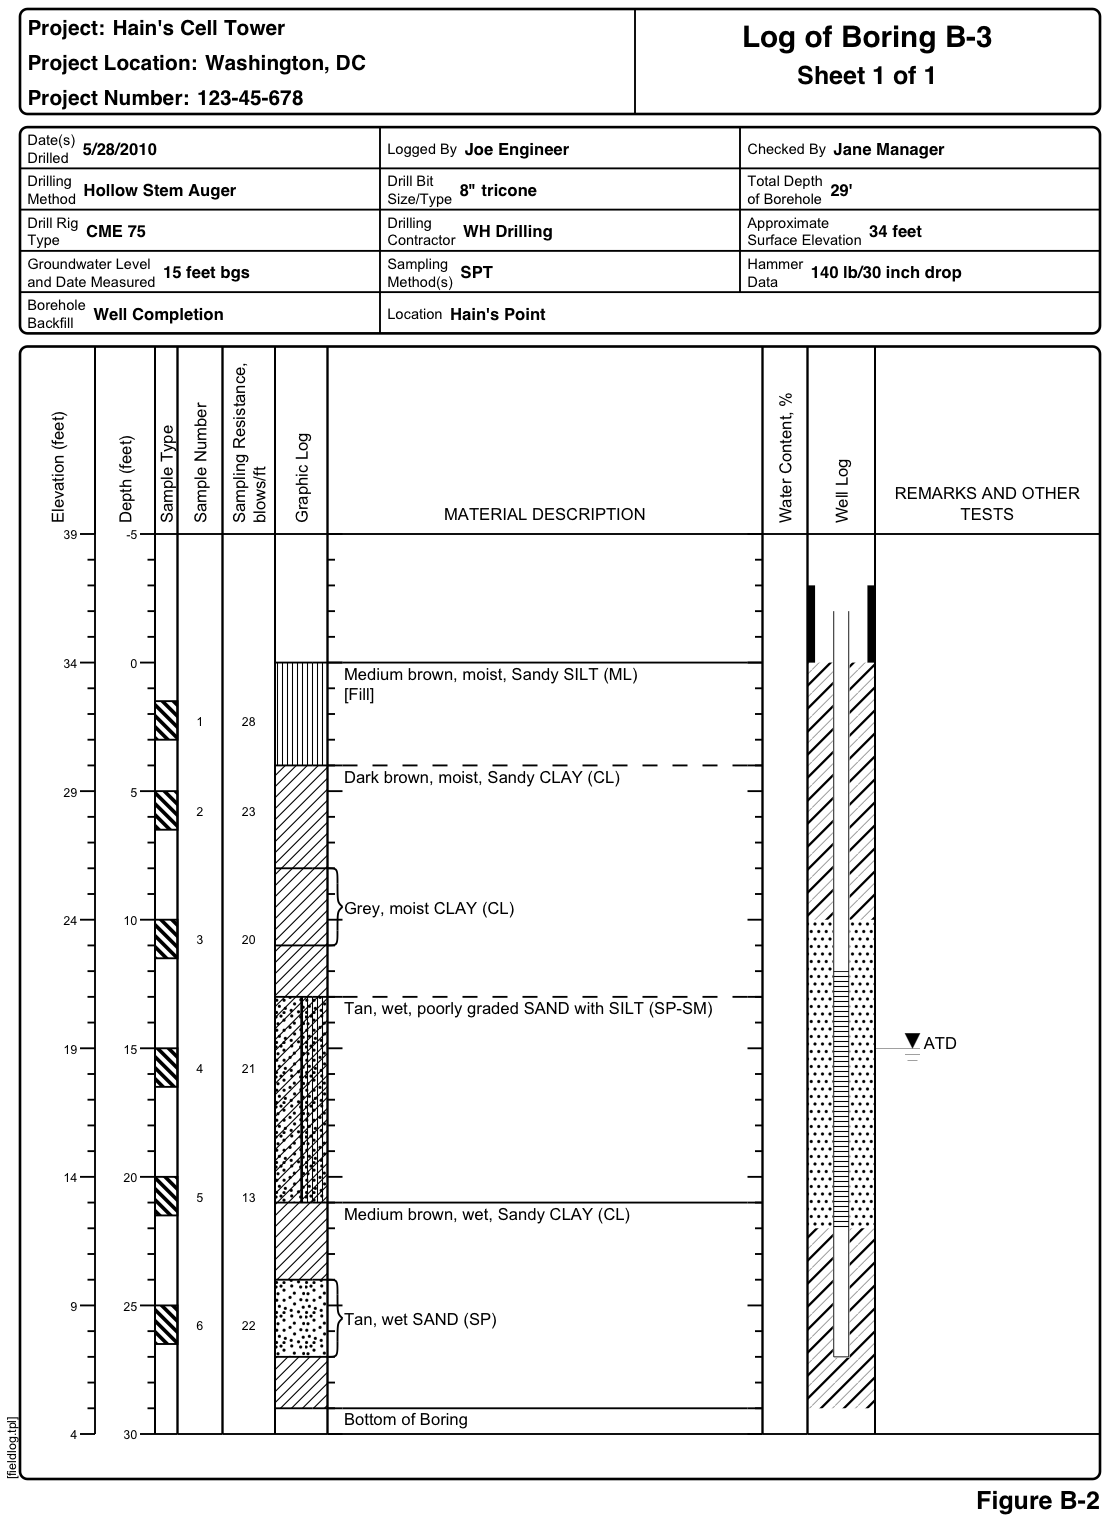
Once again, click on the "Print Log" icon on the toolbar to view the output. Now the stickup and well protector are shown, and the log fits entirely on one page.